How to replace the ball cage dust cover?
2022.11.18
Step 1: Tools and safety
Please try to find your vehicle maintenance or owner's manual for torque specifications of all nuts and bolts.
Wear protective glasses, gloves, tools in the picture, and proceed to the next step.
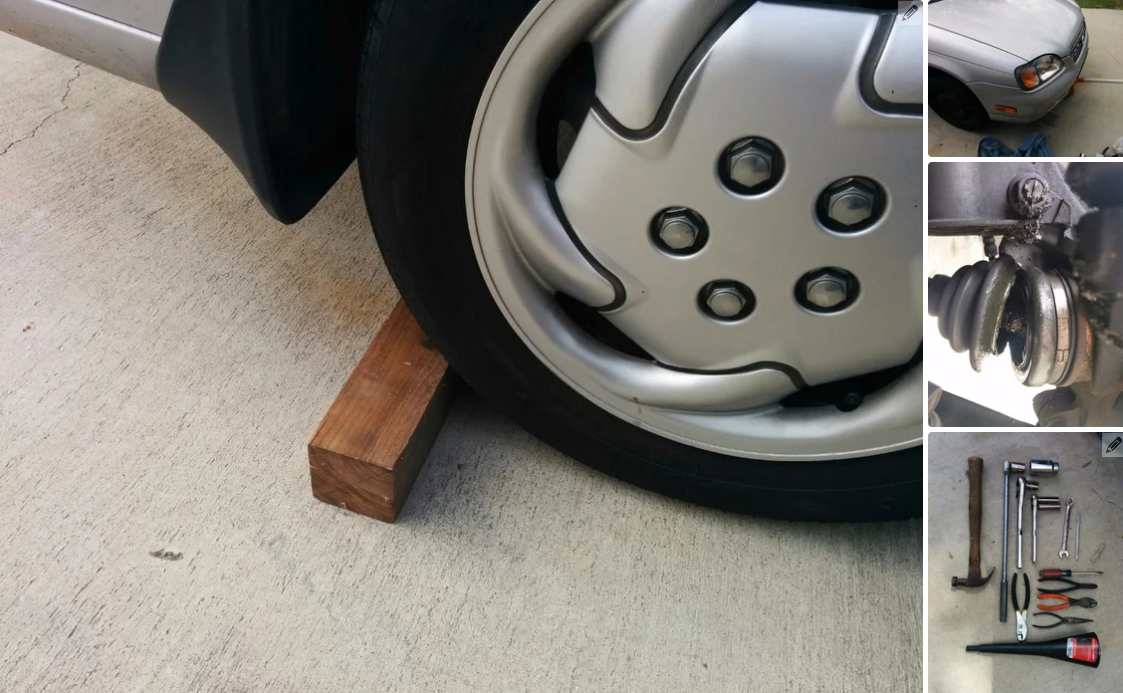
Step 2: Lift the vehicle
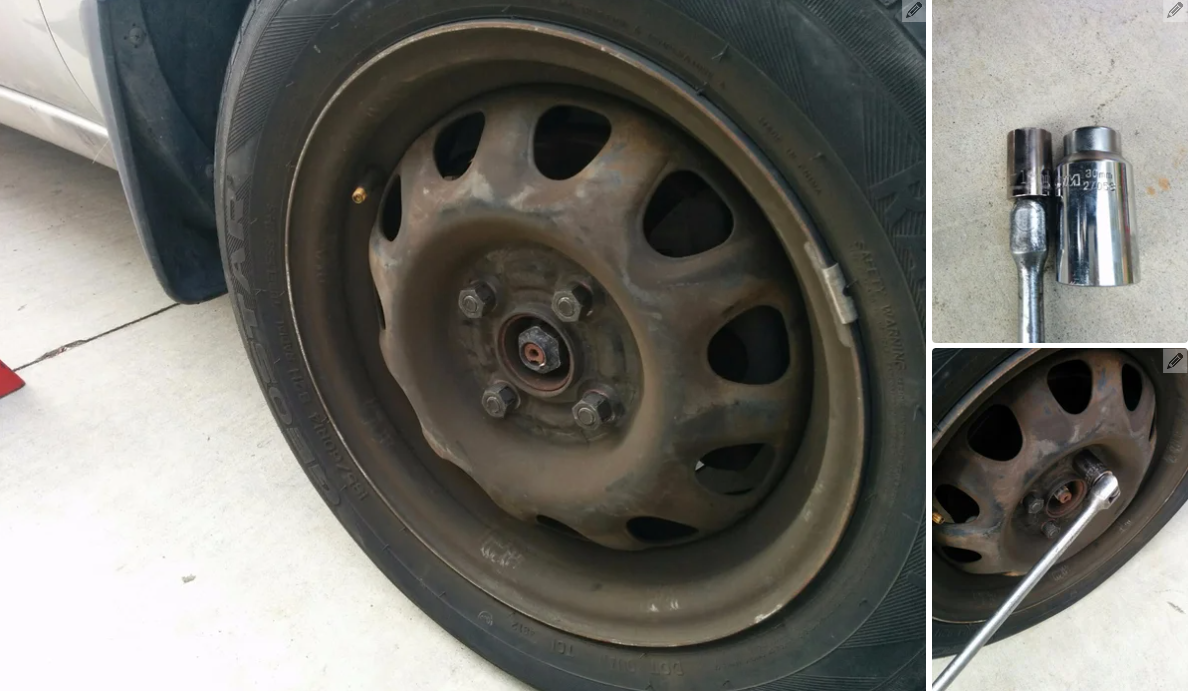
Before lifting the vehicle, remove the wheel housing and loosen the nut, turn the nut 1/4 turn, and loosen the axle nut.
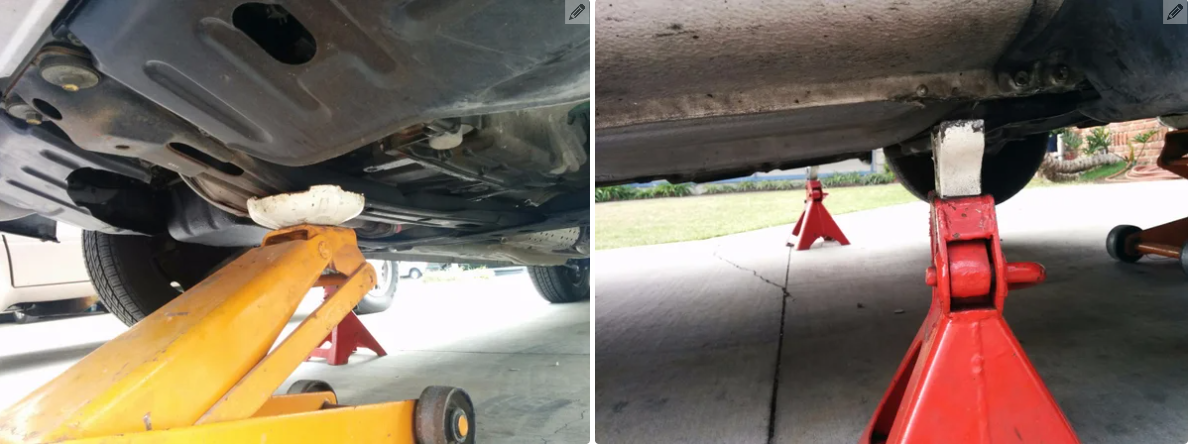
Find the solid part of the frame or body under the car, and then move the jack under the point. Raise the car enough to make the jack stand under the other two solid parts of the body or frame, preferably at the same point on both sides of the car.
Lower the jack low enough to make most of the weight fall on the bracket, but leave the jack under the vehicle to support part of the weight to increase safety.
Step 3: Remove the axle nut and wheel
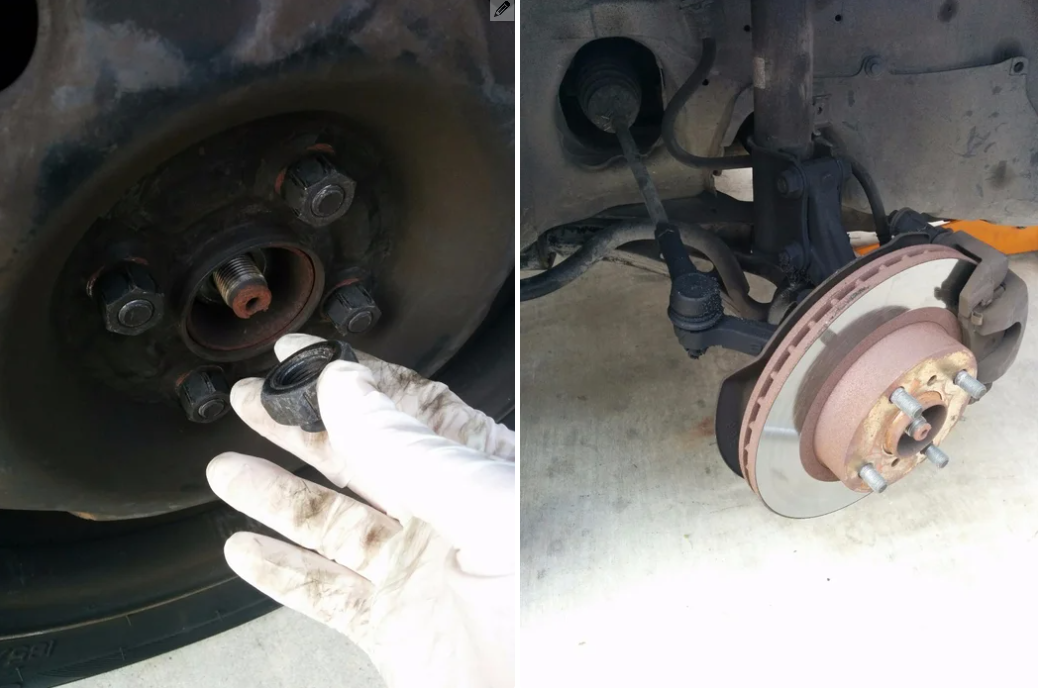
Now the axle nuts and nuts are loose, and the car is also up, completely unscrew them and remove the wheels.
Step 4: Remove the steering linkage
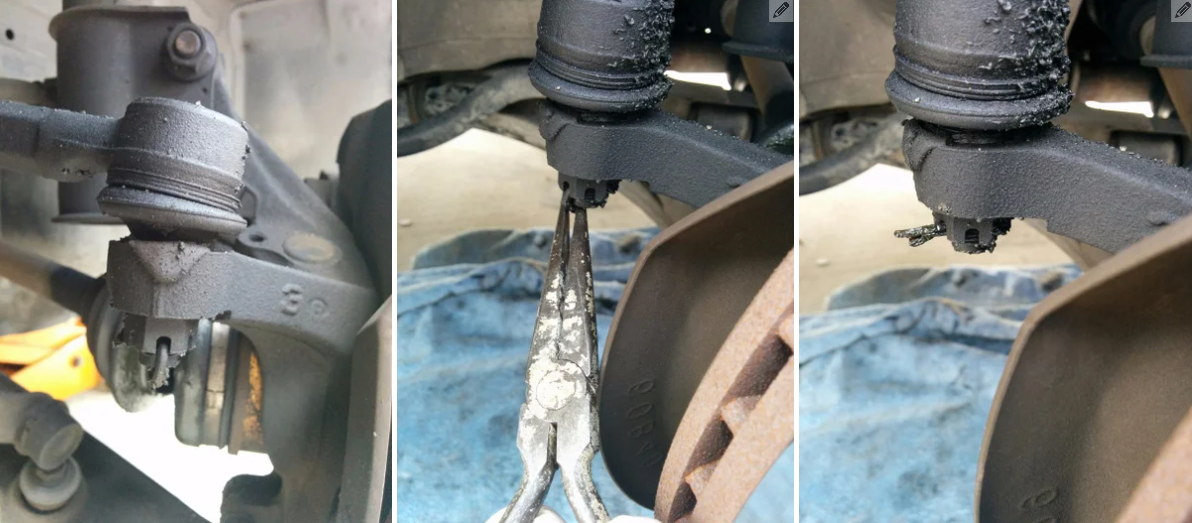
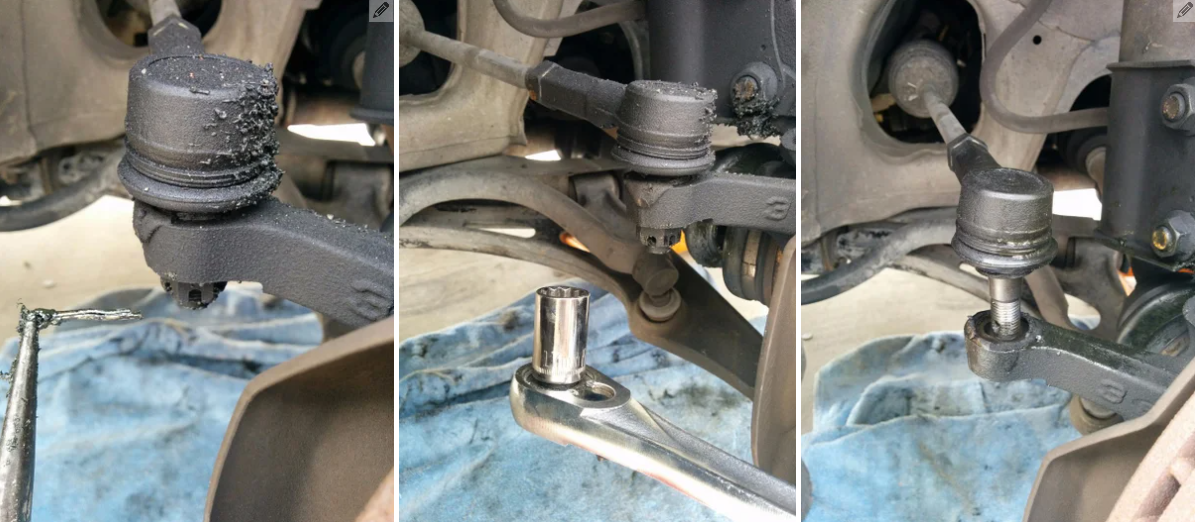
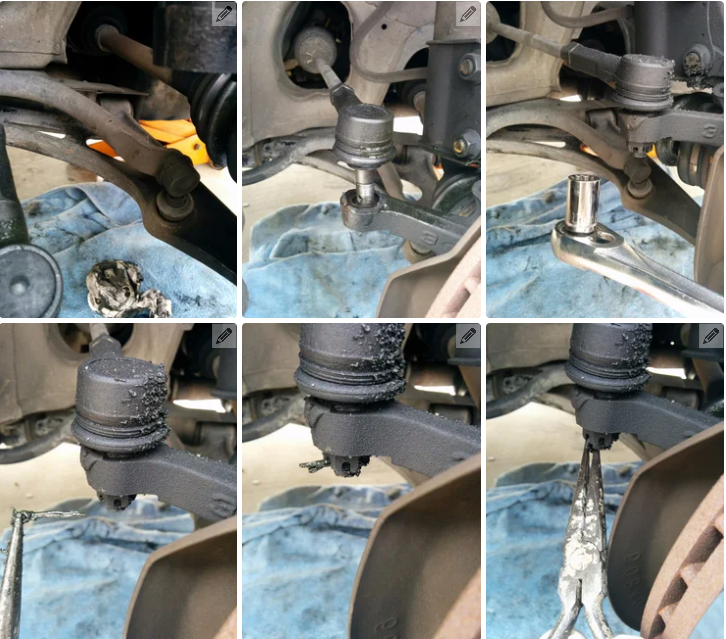
The first connecting rod to be removed is the steering rod (tie rod).
First remove the cotter pin with pointed-nose pliers. Bend the pin and pull the round end to remove it.
Next, use a socket wrench to remove the slotted nut.
Finally, use a wood or plastic hammer to knock the threaded end of the nut just removed. If you have only one metal hammer, use a piece of wood between the hammer and the ball joint stud. If this doesn't work, you may need to hit it hard. Be careful not to hit it directly with a metal hammer to avoid damaging the thread. You can also try to partially install the nut back onto the stud, so that you can hit the nut instead of the threaded stud. You can also use a metal hammer to hit the stuck part of the threaded rod according to the instructions in the picture. Go to the next step after removal.
Step 5: Remove the stabilizer link
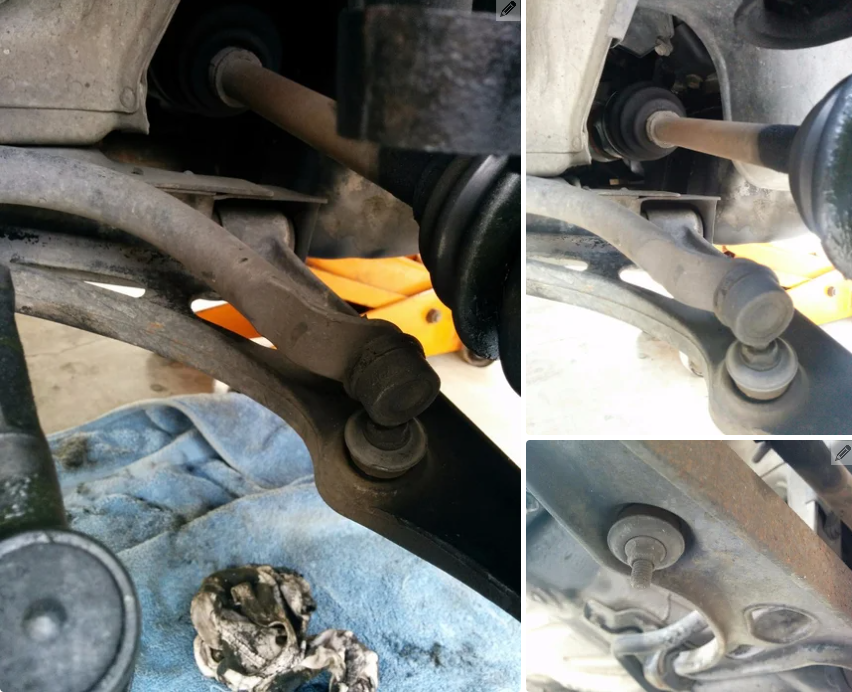
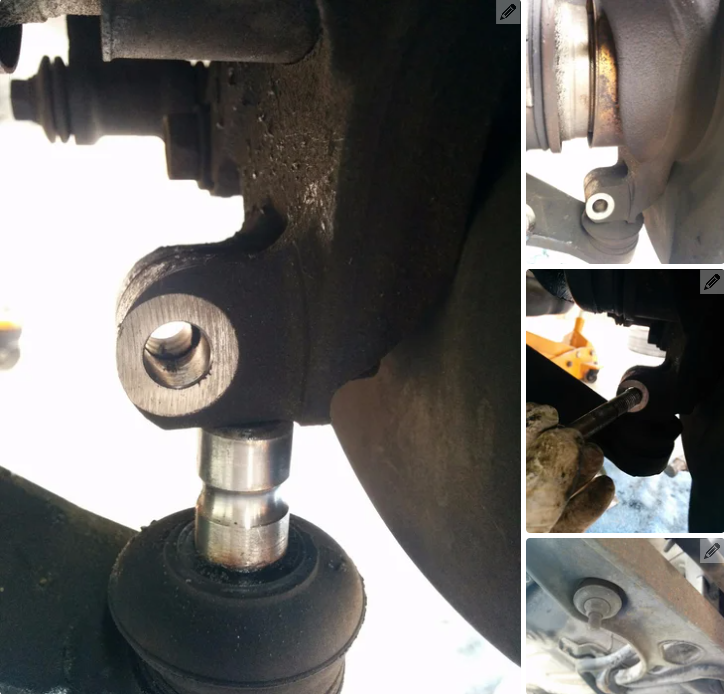
Step 6: Remove the lower arm bolt

This bolt not only fixes the lower arm ball joint in place, but also passes through a small circular groove in the ball joint pin. Hold the bolt and loosen it, remove the nut, and the bolt slides out.
Now the lower arm pin should also slide out from the bottom.
Step 7: Disconnect the steering knuckle from the axle
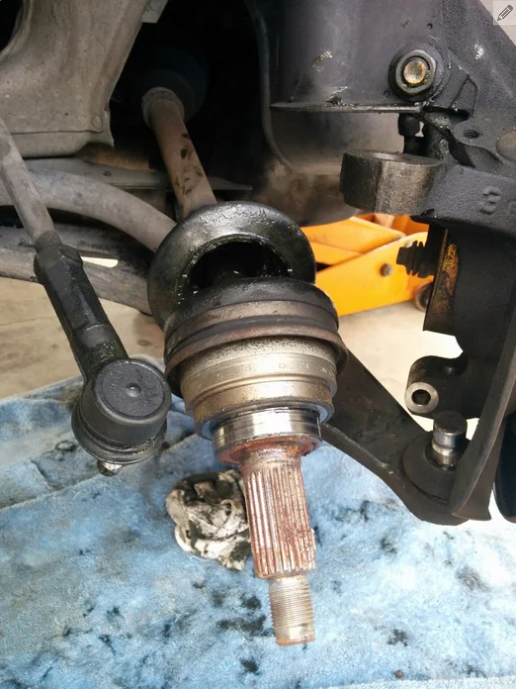
The entire steering knuckle (part of mounting wheel, brake disc, brake caliper and damping/spring system) should now be free enough to pull outward. Move it out just enough to take the shaft out of the hole.
Step 8: Remove the old clamp

First loosen the old clamp with a screwdriver. The axle is very strong, so you don't have to worry about damaging metal parts or old rubber sleeves. The tools used in this process are metal scissors, wire cutters and pliers.
Step 9: Remove the old ball cage dust cover

After removing the old clamp, you can start to cut off the old dust cover. Some useful tools for this work are wire cutters, scissors and pliers.
Once the old dust cover is completely removed, clean the shaft and bearing. Use an old rag to start wiping off the initial debris. To completely remove the old grease or debris inside the bearing, spray some carburetor cleaner into the bearing until no more grease or dirt flows out.
Step 10: Install the new ball cage dust cover

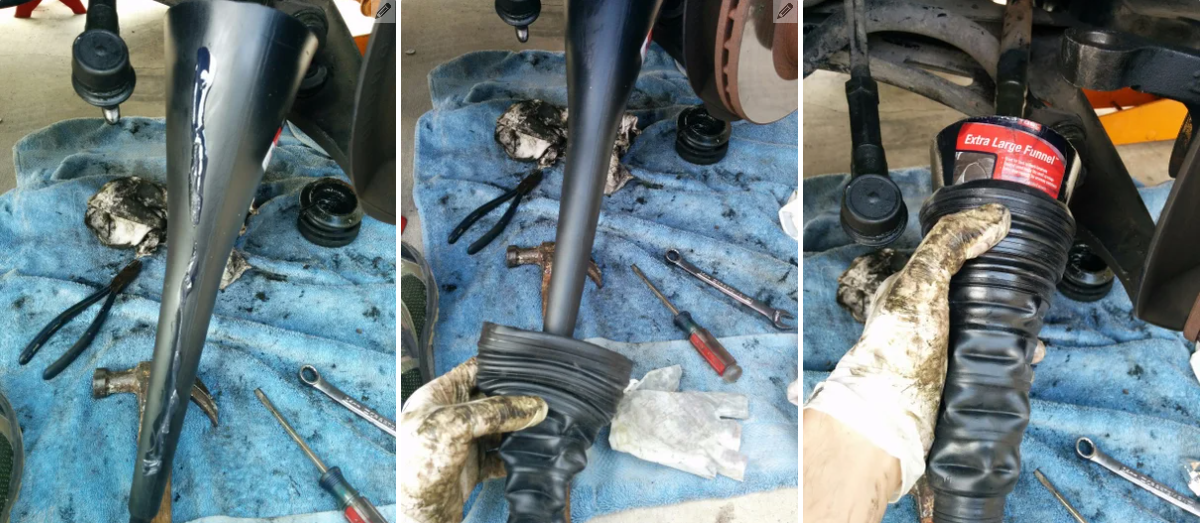
First cut the funnel so that its end slightly overlaps most of the shaft during installation. Use art knife to avoid serrated edges. Also make sure that all sharp edges are removed with a blade to make the dust cover slide smoothly without jamming or cutting.
Make sure to apply grease on the funnel to cover each part.
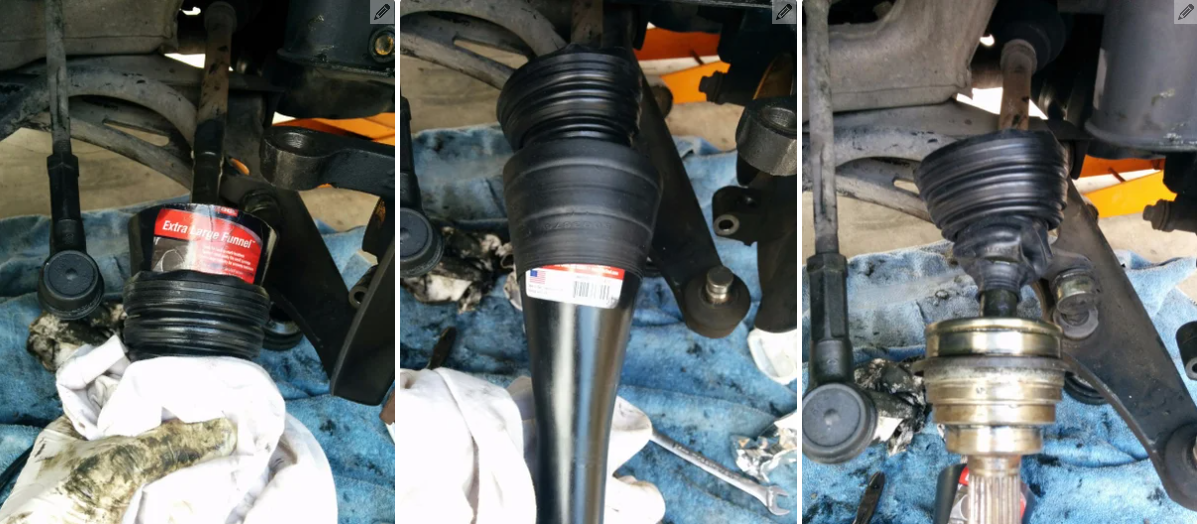
Now reverse the dust cover, push it onto the funnel and apply pressure.
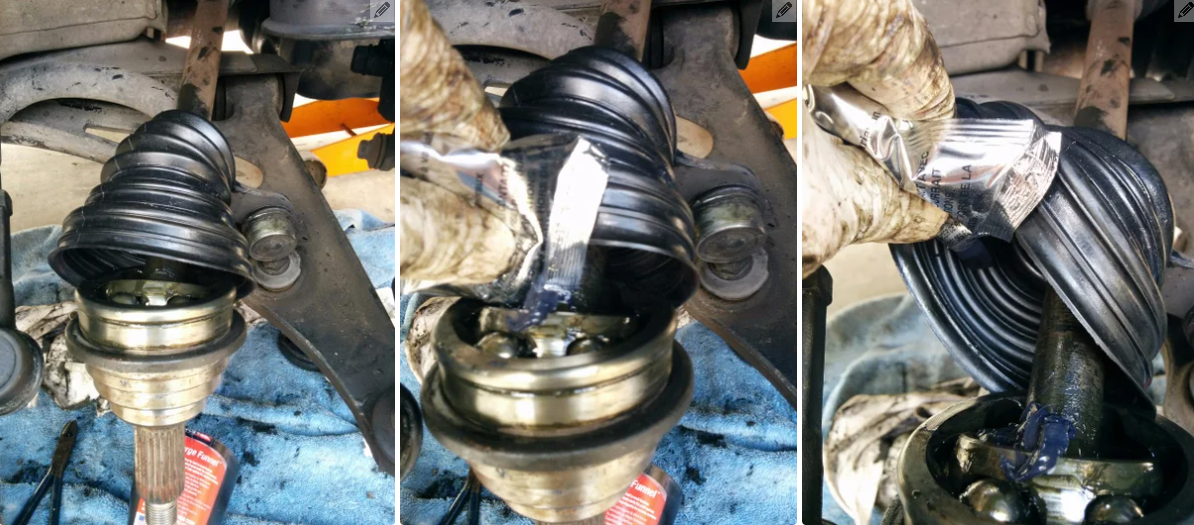
Once you put the dust cover at the end of the funnel, turn it upside down, so that it is the correct installation direction.
Apply an appropriate amount of grease to the bearing and the bearing. Apply the remaining grease to the guide near the bearing.
Step 11: Install a new clamp
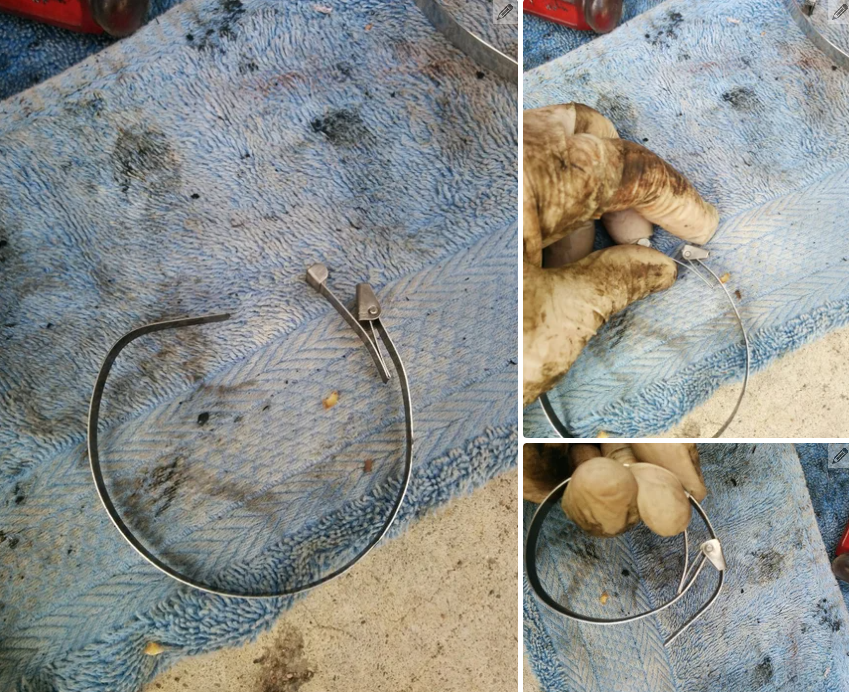
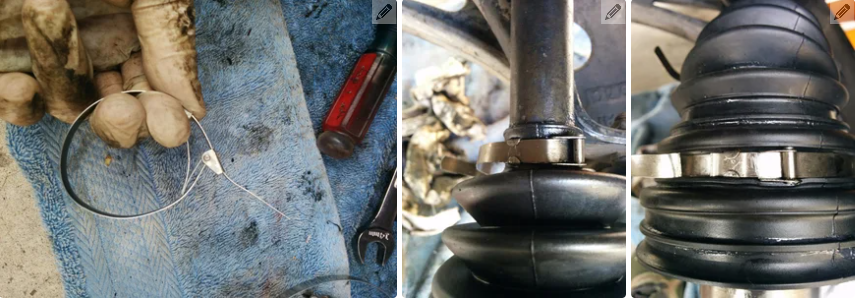
Bend the protruding part down onto the additional belt part with pliers or hammer, and cut/bend off the extra part.
Step 12: Cut off the excess dust cover
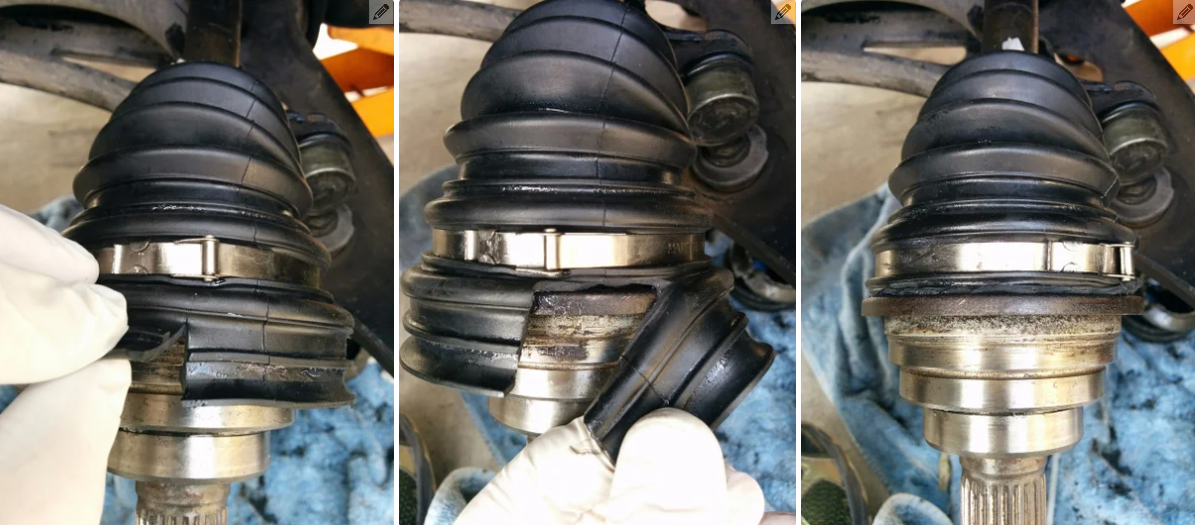
Depending on your axle size, the bellows may have an extra length. Cut off the extra boots as shown in the figure.
Step 13: Reconnect the connecting rod
Please use the correct torque specification to tighten these connecting rods, which can be found in your vehicle specific manual or online.
1. Reinstall the axle shaft into the steering knuckle.
2. Reinstall the lower arm pin, bolt and nut and tighten them.
3. Reinstall the stabilizer rod link and tighten the nut.
4. Reinstall the steering linkage, tighten the slotted nut until it is tight, and align the slot of the slotted nut with the hole in the ball joint stud. Pass the cotter pin through the slot and hole of the slotted nut and bend the end of the cotter pin to prevent it from slipping out.
Step 14: Reinstall the wheel
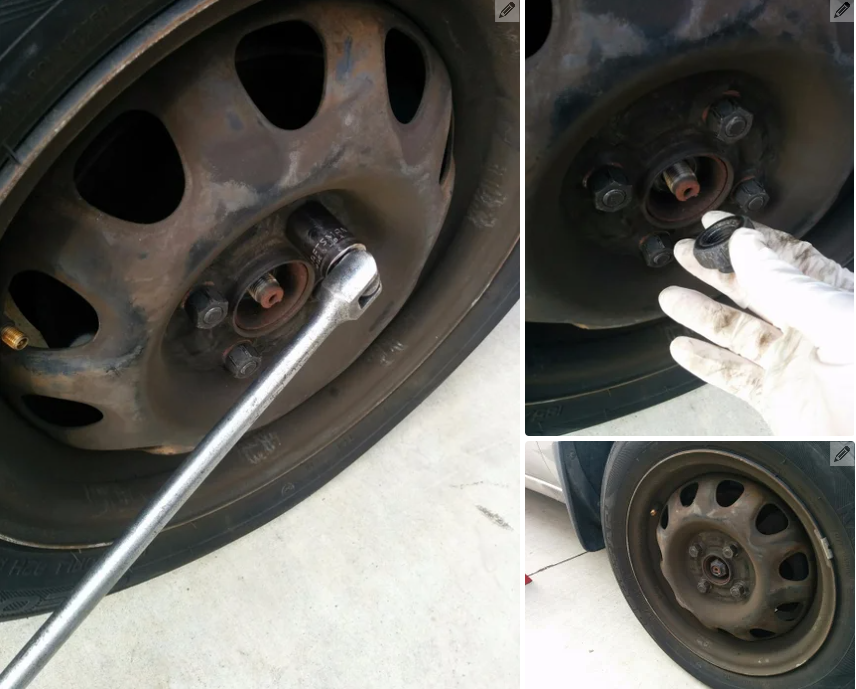
Install the wheel, install and tighten the nuts and axle nuts, and then raise the vehicle enough to remove the jack bracket.
Lower the vehicle enough to allow the tires to touch the ground to prevent them from turning.
Tighten the nut and shaft nut.
At this point, the replacement of the ball cage dust cover is complete.

